34.1.0: keepalive
23 Jun 2016
1. 清空lvs配置时在DR上的ipvsadm配置
ipvsadm -C

ifconfig eth0:0 down
因为keepalive也会用到ipvsadm,并会自动配置ipvsadm规则,所以先清空
2. 环境准备
What is Keepalived ?
Keepalived is a routing software written in C. The main goal of this project is to provide simple and robust facilities for loadbalancing and high-availability to Linux system and Linux based infrastructures. Loadbalancing framework relies on well-known and widely used Linux Virtual Server (IPVS) kernel module providing Layer4 loadbalancing. Keepalived implements a set of checkers to dynamically and adaptively maintain and manage loadbalanced server pool according their health. On the other hand high-availability is achieved by VRRP protocol. VRRP is a fundamental brick for router failover. In addition, Keepalived implements a set of hooks to the VRRP finite state machine providing low-level and high-speed protocol interactions. Keepalived frameworks can be used independently or all together to provide resilient infrastructures.
- DR - eth0:10.10.180.223
- DR-slave - eth0:10.10.180.224
- rs1 - eth0:10.10.180.221
- rs2 - eth0:10.10.180.222
rs两个服务器依然保留lvs配置时的脚本,用于配置vip和内核配置
3. keepalive安装与配置
3.1 DR和DR-slave
# DR和DR-slave均需要安装keepalived
yum install keepalived -y

# DR上的配置,DR-slave只需要更改"state SLAVE; priority 90"
cp /etc/keepalived/keepalived.conf /etc/keepalived/keepalived.conf.bak
vim /etc/keepalived/keepalived.conf
******************************************
! Configuration File for keepalived

global_defs {
   notification_email {
     acassen@firewall.loc
     failover@firewall.loc
     sysadmin@firewall.loc
   }
   notification_email_from Alexandre.Cassen@firewall.loc
   smtp_server 192.168.200.1
   smtp_connect_timeout 30
   router_id LVS_DEVEL
}

vrrp_instance VI_1 {
    state MASTER
    interface eth0
    virtual_router_id 51
    priority 100
    advert_int 1
    authentication {
        auth_type PASS
        auth_pass 1111
    }
    virtual_ipaddress {
        10.10.180.220
    }
}

virtual_server 10.10.180.220 80 {
    delay_loop 6
    lb_algo wlc
    lb_kind DR
    nat_mask 255.255.255.0
    persistence_timeout 50
    protocol TCP

    real_server 10.10.180.221 80 {
        weight 1
        TCP_CHECK {
            connect_timeout 10
            nb_get_retry 3
            delay_before_retry 3
            connect_port 80
        }
    }

    real_server 10.10.180.222 80 {
        weight 1
        TCP_CHECK {
            connect_timeout 10
            nb_get_retry 3
            delay_before_retry 3
            connect_port 80
        }
    }
}
******************************************

# 启动服务(先主后从)
/etc/init.d/keepalived start
echo 1 > /proc/sys/net/ipv4/ip_forward

# 检查vip是否配置
ip a show eth0
2: eth0: <BROADCAST,MULTICAST,UP,LOWER_UP> mtu 1500 qdisc pfifo_fast state UP qlen 1000
    link/ether 00:0c:29:86:fe:ca brd ff:ff:ff:ff:ff:ff
    inet 10.10.180.223/24 brd 10.10.180.255 scope global eth0
    inet 10.10.180.220/32 scope global eth0
    inet6 fe80::20c:29ff:fe86:feca/64 scope link
       valid_lft forever preferred_lft forever

# 检查ipvsadm
ipvsadm -ln
IP Virtual Server version 1.2.1 (size=4096)
Prot LocalAddress:Port Scheduler Flags
  -> RemoteAddress:Port           Forward Weight ActiveConn InActConn
TCP  10.10.180.220:80 wlc persistent 50
  -> 10.10.180.221:80             Route   1      0          0
  -> 10.10.180.222:80             Route   1      0          0
3.2 RS
# 执行内核和网卡配置脚本
sh /usr/local/sbin/lvs_dr_rs.sh
/etc/init.d/nginx start

# 检查vip配置
ifconfig lo:0
lo:0      Link encap:Local Loopback
          inet addr:10.10.180.220  Mask:255.255.255.255
          UP LOOPBACK RUNNING  MTU:16436  Metric:1
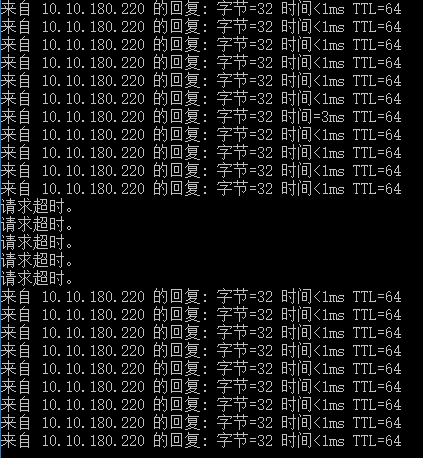
4. 检查效果
停掉rs2的nginx后,会自动切到rs1
停掉DR上的network,会自动切换到DR-slave上,不过中间会有部分时间间隔