zabbix: usage - quick start
28 Nov 2015
1. web管理端操作
1.1 登录
用admin登录web端http://<zabbix-server-ip>/zabbix
zabbix-ser-ip是你服务器ip
1.2 添加host
- 点击
Configuration->Hosts - 点击
Create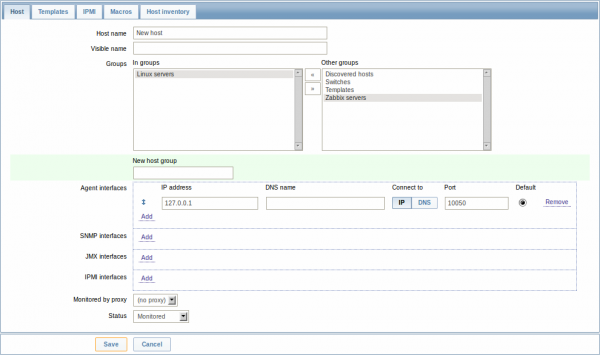
必填参数:
- Host name: 主机名称
- Groups: 选择归属的组。zabbix对于权限的管理是以组为单位
- IP address: ip地址(如果需要填写zabbix server的ip地址,要去zabbix_agent的配置文件中把Server标识后面指定这个ip地址)
完成后,点击save
1.3 添加item
- 点击
Configuration->Hosts, 找到我们创建的主机,然后点击items链接 - 点击
create item
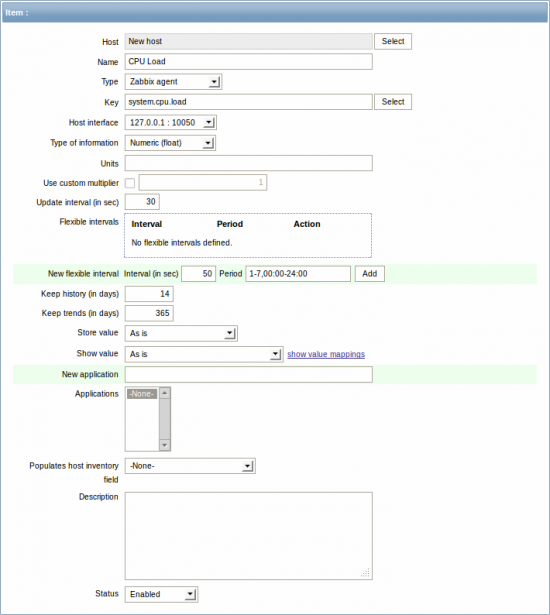
必填参数
- Name: item的名称,这里我们填写CPU load
- Key: key承担了搜集信息的作用,这里我们填写”system.cpu.load”
- Type of information: 选择Numeric(float),这指定了搜集数据的格式(这个填写错误,会导致items一直显示not support)
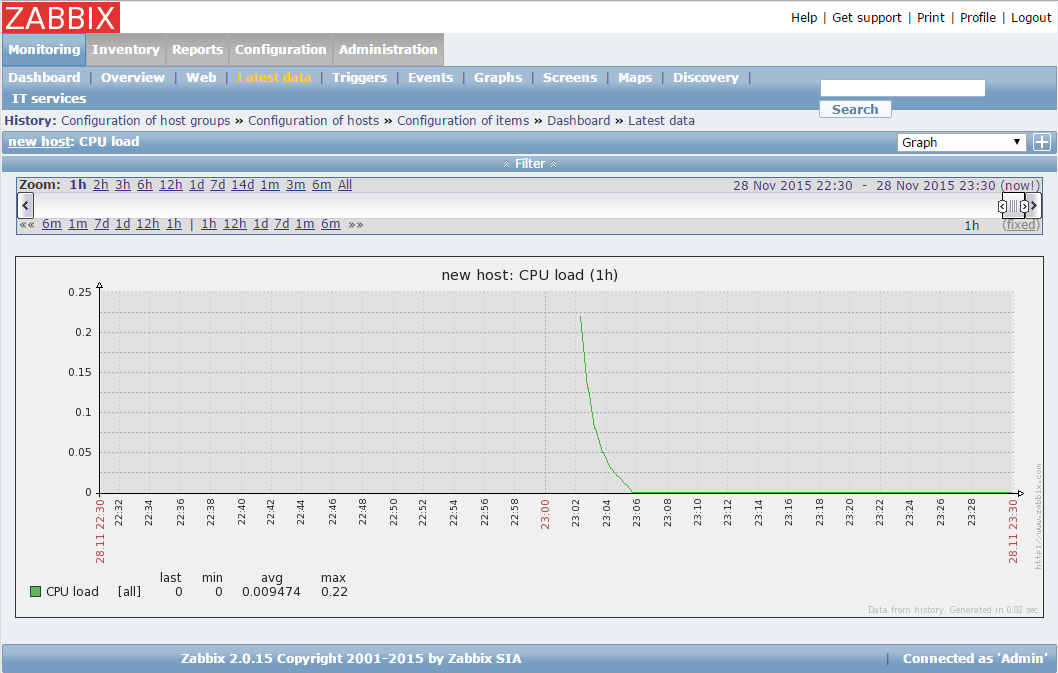
查看数据
点击monitor -> Latest data,点开other的+
需要注意的几点
- 数据会有延迟
- 确保items的那几个基本参数无误
- server上的zabbix-agent和zabbix-server服务开启
- new host的状态必须是Monitored
- item的状态必须是Enabled
1.4 增加新的trigger
- configuration -> hosts,点击trigger链接
- 点击create trigger
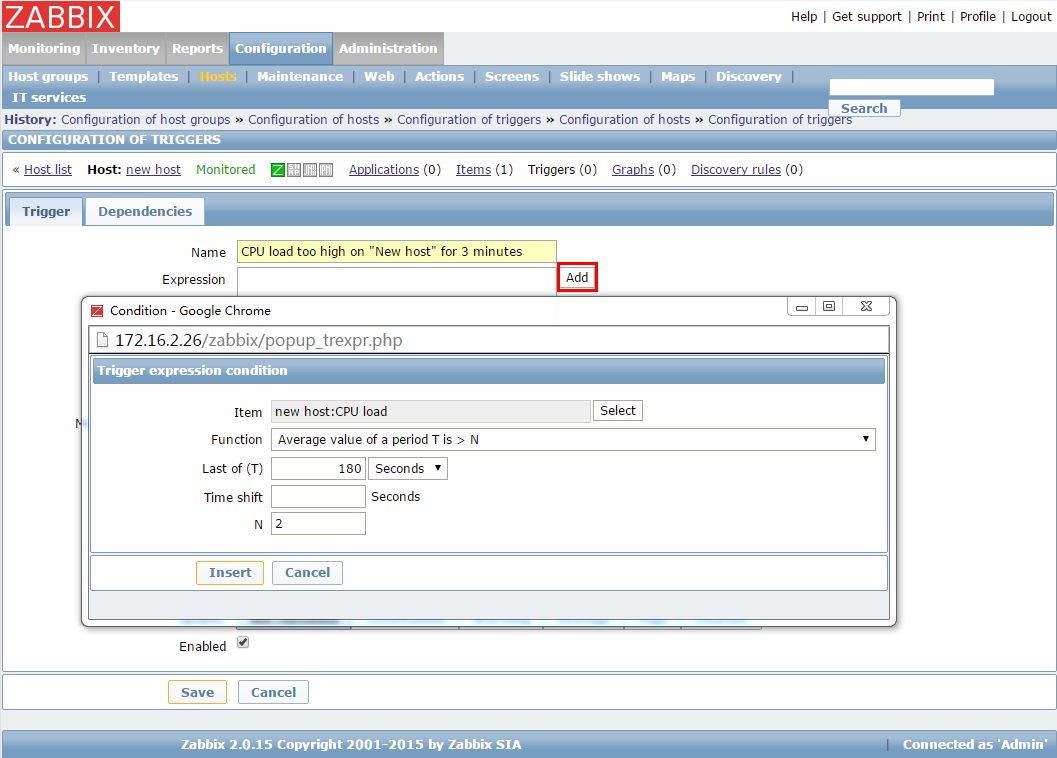
最精华的两个参数
- name: 这里我们填写”CPU load too high on ‘new host’ for 3 minutes”
- expression
- 这个表达式按照上图所示,可以选择项目,然后自动生成。
- 我们表达式的含义,是用我们做的item去检测cpuload,只要这个值大于2,持续180秒以上,就触发此trigger
- 表达式语法:https://www.zabbix.com/documentation/2.0/manual/config/triggers/expression
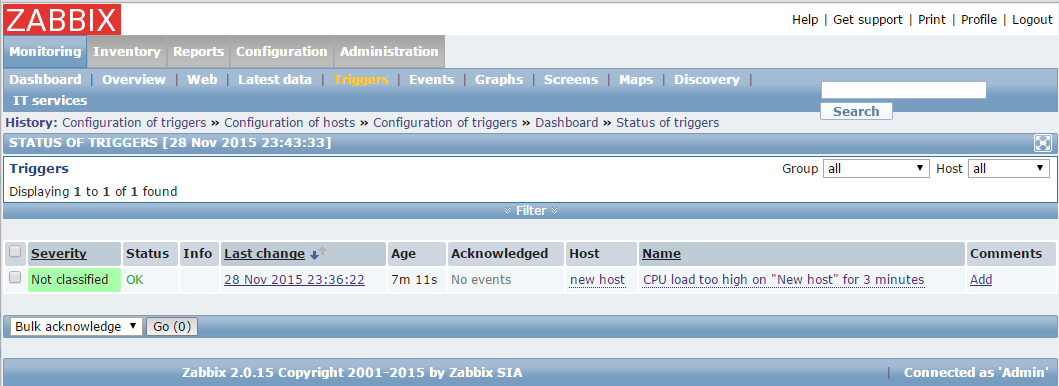
查看trigger状态
Monitoring->Triggers
2. 用户管理
2.1 添加用户组
- 选择Administration->users->create user group
- 选择组中的用户
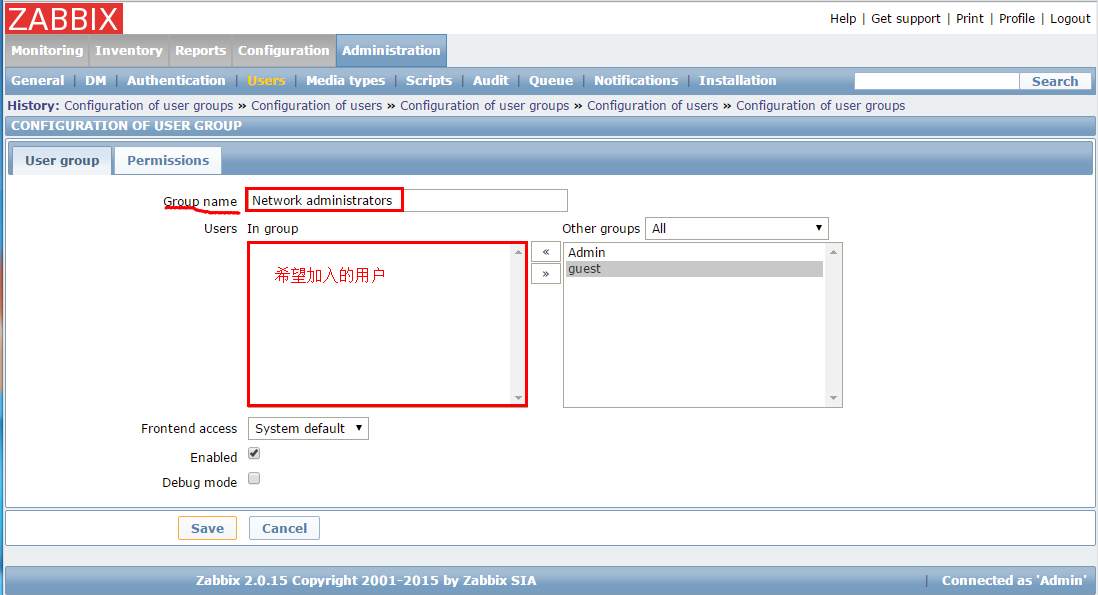
- 点击permissions tab编辑组权限
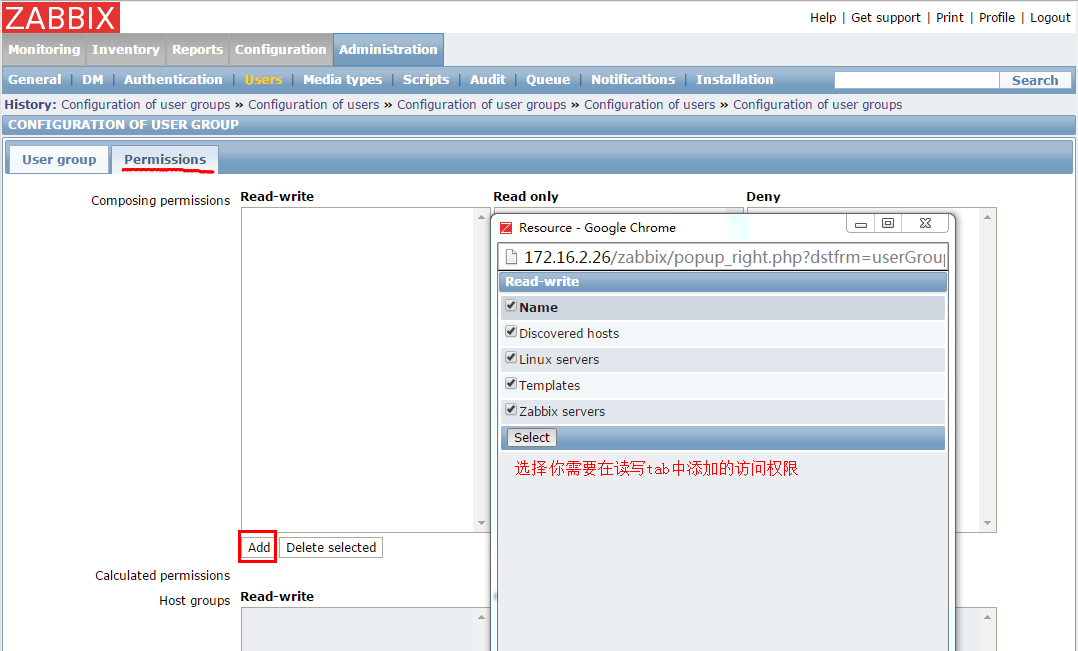
zabbix中的权限只针对user group,不针对user
2.2 添加用户
- 选择Administration->users->user group(下拉选择users)
- 选择create user
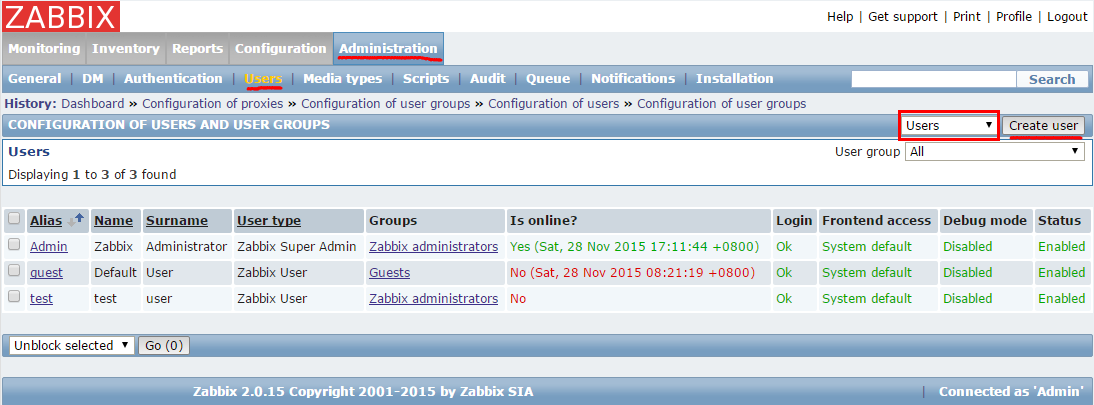
- 在user tab选择username和usergroup
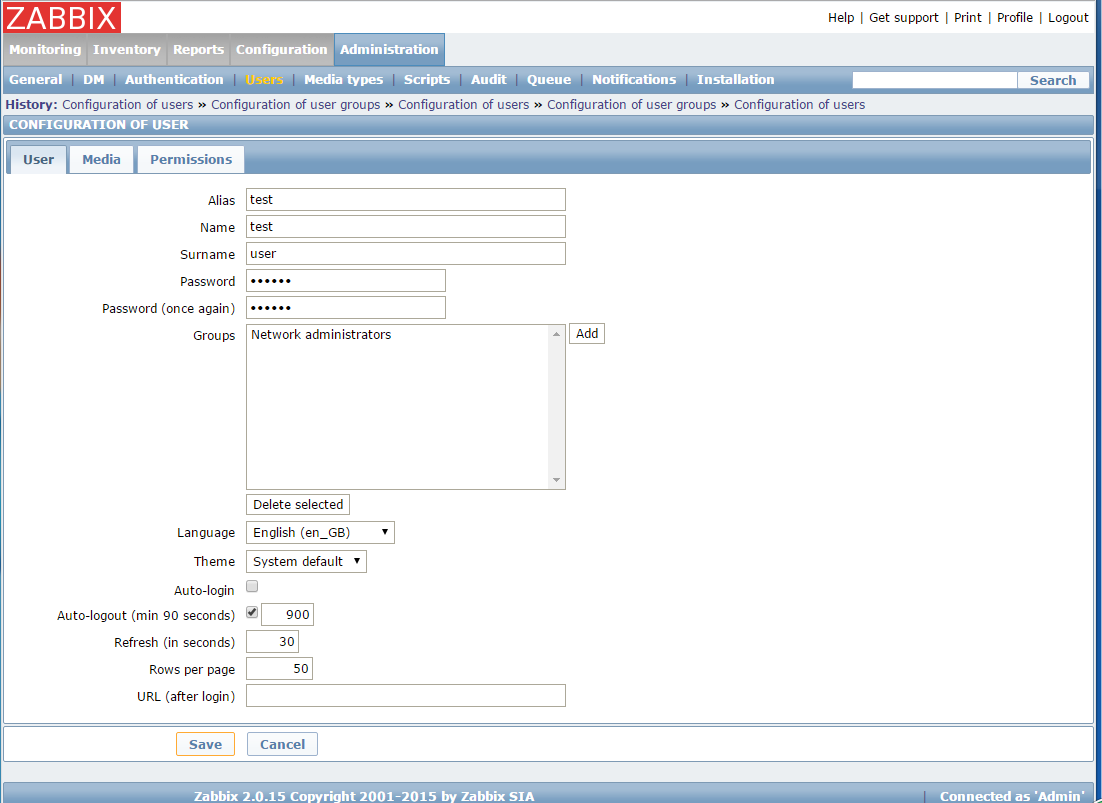
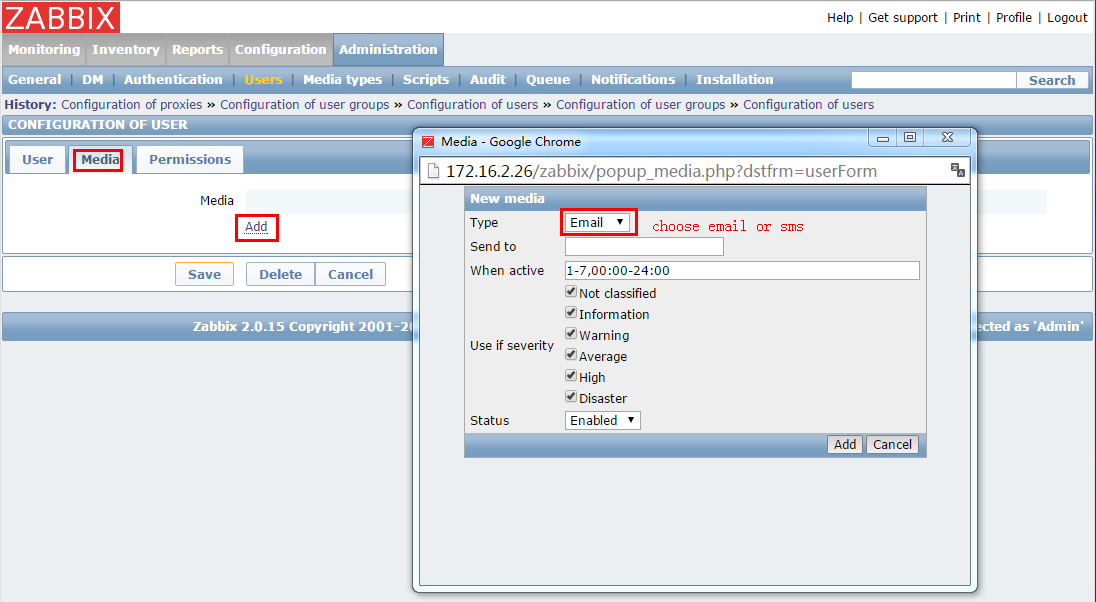
- 在media tab添加email通知模式
3. 客户端安装
3.1 源码安装客户端
wget http://netix.dl.sourceforge.net/project/zabbix/ZABBIX%20Release%20Candidates/2.0.15rc1/zabbix-2.0.15rc1.tar.gz
tar zxvf zabbix-2.0.15rc1.tar.gz
cd zabbix-2.0.15rc1
./configure --prefix=/usr/local/zabbix20/ --enable-agent
make
make install
3.2 客户端配置
vim /usr/local/zabbix20/etc/zabbix_agentd.conf
*********************************
Server=172.16.2.26    # 172.16.2.26是zabbix服务端的地址
ServerActive=172.16.2.26
Hostname=nagios.example.com
*********************************
3.3 用户创建
groupadd zabbix
useradd -g zabbix zabbix
3.4 启动服务&开机启动
/usr/local/zabbix20/sbin/zabbix_agentd
echo /usr/local/zabbix20/sbin/zabbix_agentd >> /etc/rc.local
错误
**错误信息: **
Starting zabbix_agentd: /usr/local/zabbix/sbin/zabbix_agentd: error while loading shared libraries: libiconv.so.2: cannot open shared object file: No such fileor directory**解决方案: **
echo /usr/local/lib/ >> /etc/ld.so.conf; ldconfig
3.5 firewalld
firewall-cmd --permanent --add-rich-rule='rule family=ipv4 source address="172.16.2.26" port port=10050 protocol=tcp accept'
firewall-cmd --permanent --add-rich-rule='rule family=ipv4 source address="172.16.2.26" port port=10050 protocol=udp accept'
firewall-cmd --reload